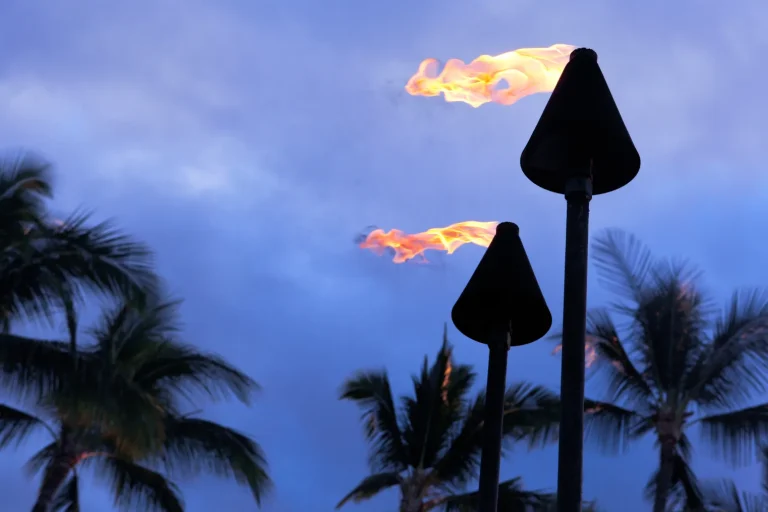
If you want your best Chief’s Luau photos, timing and seat choice do most of the work. Show up by 5:00 or 5:15 PM and you’ll have room to catch warm lei portraits, the smoky imu reveal, and a clean stage angle before the crowd fills in. Royal or center-front seating gives you the sharpest view once the fire knives start flashing in the dark. The trick is knowing when to switch from sunset glow to fast, low-light settings.
Key Takeaways
- Arrive by 5:00–5:15 PM to catch golden light, the lei greeting, posed dancer photos, and the imu ceremony before crowds build.
- Choose Royal or front-and-center seating for the clearest stage angles, fewer obstructions, and better access to early portraits.
- Shoot lei and hula portraits between 5:30–6:00 PM for warm sunset color and more relaxed expressions before the show starts.
- Stand front-and-center for the imu reveal, then move to the buffet entrance around 6:00 PM to capture first plates and reactions.
- For fire-knife shots, use a fast lens, ISO 1600–3200, AF-C, and 1/125–1/250 sec from front-center seats.
Find the Best Photo Spots at Chief’s Luau
Camera first, mai tai later. At Chiefs Luau, your best photo spots come from smart positioning, not luck. Check in around 5:00 PM so you can frame the luau grounds and Wet’n’Wild Kapolei backdrop during the imu ceremony. The light is soft, the crowd is still settling, and the setting feels cinematic. Chief’s Luau check-in around 5:00 PM also gives you time to settle in before the main festivities begin.
For stage shots, ask for front-and-center seating or the Royal Package. First-row tables like 5A give you clean angles on performers and Chief Sielu. Right after check-in, Royal guests get leis and posed photos with dancers, which is an easy early win. Keep your camera ready when the roast pig comes onstage. The dancers pause, and you get a clear look before carving starts. Stay through the finale for fire-knife drama and the big Aloha Oe group photo.
Pick the Best Time for Luau Photos
Timing matters just as much as where you sit, because Chief’s Luau changes fast once the evening starts rolling. Use each phase well, and you’ll leave with varied shots instead of fifty lookalike stage photos. First, use the greeting window for portraits with performers and your flower lei. Arriving early also gives you time to photograph the pre-show experience before the main performance begins.
| Time | What to shoot | Why it works |
|---|---|---|
| Pre-show | Lei portraits | Fresh smiles |
| Before dinner | Imu pig reveal | Dramatic close-ups |
| Dinner start | Stage moments | Clear shifts |
| Late show | Fire-knife acts | Big action |
| Finale | Group photo | Full cast energy |
If you want the sharpest fire-knife images, stay through the finale and sit close in Royal Experience seats. You’ll also catch Chief Sielu at full speed, plus that warm “Aloha Oe” finish.
Arrive Early for Lei and Sunset Shots
If you arrive by the 5:00 PM check-in, you’ll get your fresh flower lei, snap a few posed photos with hula dancers, and still have time to scout a sunset spot before the show. At check-in, the lei greeting also adds a festive welcome that can make your first photos feel more authentic to the luau experience. Try to be settled 30 to 45 minutes before curtain, because that’s when the imu pig presentation and the best golden-hour light line up. If Friday traffic crawls on the westbound drive, give yourself extra time so you’re not chasing the sun with a camera in one hand and a Mai Tai in the other.
Lei Greeting Timing
Ideally, you’ll get there a little before the 5:00 PM check-in so you can line up for the Royal Package lei greeting and catch the best light before the crowd thickens. That small head start matters. You’ll have room to settle in, frame a few clean shots, and avoid the shoulder-to-shoulder rush that builds fast.
With the Royal Package, you’ll receive a fresh flower lei and a welcome Mai Tai at greeting, so keep your camera ready. Performers often pause for posed photos right after check-in, and that’s your best moment for solo or close-up lei shots. The flowers look crisp, the smiles feel relaxed, and the pre-show buzz is just getting started. If you wait too long, the line swells and those easy portrait moments disappear pretty quickly. If you’re debating the photo package, these early portraits may be the easiest shots to capture well on your own.
Sunset Photo Window
Show up by 5:00 to 5:15 PM and you’ll set yourself up for more than the lei greeting. You’ll have time for hula dancer photos, then slide into the sunset photo window around 5:30 to 6:00 PM. Head near the imu staging area or the shoreline-facing side for warm skies and that classic Wet’n’Wild backdrop. If you booked the Royal Experience, early arrival gives you first-row angles for your lei, welcome Mai Tai, and clean stage views before crowds fill in. The best seats can also give you clearer sightlines for stage photos and better chances to capture key moments without people blocking your frame.
- Catch the gold light before stage lighting steals the sky.
- Frame your lei against the sunset and feel the island mood click.
- Stay for the imu ceremony and the roast pig presentation. It’s dramatic and surprisingly moving.
- Bring a small tripod or use portrait mode once dusk sneaks in fast.
Capture the Imu Ceremony and Buffet
Because the imu reveal happens fast and glows best in late-day light, get to Chief’s Luau before sunset, when check-in starts at 5:00 PM, and claim a front-and-center spot or Royal seating for a clear view of the roast pig coming up and being presented on stage. Even if this is your First Luau, you’ll be ready for the imu ceremony with a 24 to 70mm zoom.
Use that range to catch the crowd, the lifted leaves, and quick reactions without shuffling around. The Imu Ceremony is a traditional part of a chief’s luau, so keep your camera ready as the reveal begins. After the pig presentation, head toward the buffet entrance before sections are called around 6:00 PM. Wait for those first plates of kalua pork and local favorites. Indoors, switch to a fast lens or raise ISO. Shoot plates at a 45-degree angle so poi, taro rolls, and pineapple cake look vivid.
Get Better Stage Photos With Royal Seating
Lean into Royal seating if you want your stage photos to look crisp without fighting heads, phones, or a long zoom. The Royal Experience puts you front and center, often in spots like table 5A, where performers fill the frame with real detail. Arrive by 5:00 PM so you can catch warm light before dinner and photograph stage-side portraits, greetings, and lei moments. This VIP seating advantage also means you are more likely to get the front-and-center views that make low-light stage shots easier.
Choose Royal seating for crisp stage photos, warm pre-dinner light, and close performer detail without distractions.
- You feel closer when Chief Sielu starts talking and every expression lands.
- You relax because unobstructed tables save you from awkward phone dodging.
- You get playful early since your welcome Mai Tai and three drink tickets buy time before the buffet.
- You stay ready as warm lights shift, wait staff pass, and fast dances demand quick exposures with confidence. Here, timing finally feels easy.
Photograph the Fire Knife Show in Low Light
Often, the fire knife finale looks impossible to photograph until you treat the dark stage like part of the drama and set your camera for speed. For your first time, mount a fast lens at f/1.8 to f/2.8 and keep it wide open. Start around ISO 1600 to 3200. Noise happens, but a visible performer beats a muddy silhouette.
Set shutter speed between 1/125 and 1/250 sec to freeze spins while preserving some flame trails. If you want longer ribbons of fire knife light, try 1/30 to 1/60 and brace yourself or use a monopod. Switch to AF-C and burst mode, especially from front and center Royal seating. Leave extra headroom for arcs of fire. Meter on the brightest flame so highlights don’t blow out, then lift shadows later. At Chief’s Luau, the Fire Knife Dance blends flame and rhythm, so time your bursts for the peak of each spin or toss.
Frequently Asked Questions
Can Guests Use Tripods or Monopods During Chief’s Luau?
You usually can’t use large tripods, and you should ask about monopods at check-in. Like bringing an anchor to a dance, ignore tripod etiquette and equipment restrictions, and you’ll obstruct views, aisles, and safety.
Are Smartphones Allowed for Photos Throughout the Entire Event?
Yes, you can use your smartphone for photos and videos throughout the entire event, from pre-show activities to the performance. Follow smartphone etiquette: don’t use flash, block views, or ignore photo limitations during fire segments.
What Camera Settings Work Best for Moving Dancers?
Like lightning, you’ll capture moving dancers with a fast shutter, start at 1/500s, push 1/1000s for fire spins. Use high ISO 800–1600, shoot wide at f/2.8–f/4, and switch to burst AF for crisp action.
Can You Take Photos With Chief Sielu After the Show?
Yes, you can take photos with Chief Sielu after the show during the meet and greet. You’ll usually find autograph opportunities too. Stay a few minutes after the finale, expect a short line, and keep your camera ready.
Is Flash Photography Permitted During the Performance?
No, you can’t use flash during the performance. You should follow audience etiquette and respect lighting restrictions, since flash distracts dancers and disrupts dark scenes. You can still take photos and video without flash throughout.
Conclusion
With a little planning, you’ll leave Chief’s Luau with photos that feel alive. Arrive by 5:00, catch the warm lei light, and claim a center-front view before the crowd thickens. Use sunset for portraits, stay ready for the smoky imu reveal, and switch to a fast lens when the fire knife starts to hiss and spin. Think of the night as a moving postcard. You’re not just watching the show. You’re collecting its glow.