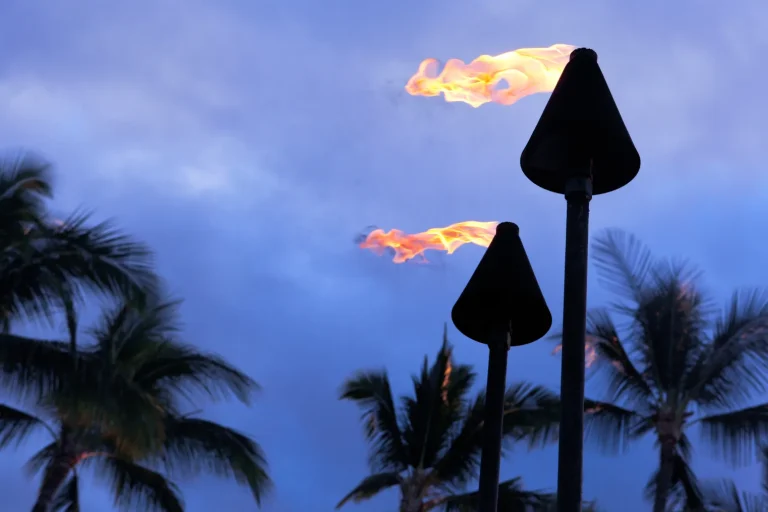
Just as the conch shell sounds and the sky turns copper, you realize the best luau footage starts before the dancers hit full speed. You frame wide first so the stage, swaying palms, tiki torches, and murmuring crowd all breathe in one shot. Then you edge closer for drum hands, lei details, and quick smiles between chants. Keep your camera up during the pauses too, because the most useful moment usually happens right after you think the scene is over.
Key Takeaways
- Open with an 8–12 second wide shot showing the stage, audience, tiki décor, and sunset to establish the luau atmosphere.
- Film continuous wide coverage during entrances, applause, and transitions to capture natural reactions and maintain smooth visual continuity.
- Move in with two small steps for medium shots of dancers, costumes, fire details, and musicians instead of relying on digital zoom.
- Capture reaction shots and inserts during pauses, like laughter, leis, hands, drums, phones rising, and kids leaning forward.
- Hold each medium or close composition for 3–5 seconds with a level horizon and steady framing for clean, usable edits.
Start Wide to Establish the Luau
Think of your opening wide shot as the luau’s handshake. You start 25 to 35 feet back, or use a 24 to 35mm lens, and let the full scene breathe for 8 to 12 seconds. Frame the stage, the audience, and the tiki details that tell viewers where they are. Add palm fronds or a table edge in front for depth. Keep the horizon level and the performers centered.
Then either hold steady or pan slowly, just enough for editors to cut cleanly. If you need to move closer, take two small steps inward before you swing the camera. That simple rhythm preserves continuity. Keep rolling during breaks and producer entrances too. You’ll catch natural reactions, maybe even two people laughing, and won’t need to go back later. These same framing habits also pair well with best spots and timing strategies, since knowing where to stand and when to shoot helps your wide opener feel more intentional.
Film the Stage, Crowd, and Sunset
Once you’ve got that opening scene, work the stage, the crowd, and the sky like they’re all part of the same story. Stay stage-right, about 10 to 15 feet back, and hold a steady wide with heads near the top third for clean sound sync and usable edits.
| Shot | Why |
|---|---|
| Medium close lead | Adds energy |
| Crowd and sunset | Builds shifts |
Then grab one or two medium close shots from 6 to 8 feet near the front lip during key songs. Every few minutes, turn toward clapping groups, hula hands, or kids dancing. Use longer focal lengths so reactions feel natural. At golden hour, lock exposure. If you booked the VIP Experience, use the improved sightlines to capture steadier stage coverage without blocking other guests. Shoot a short timelapse or slow pans after two inward steps. During breaks, collect lei, instruments, footwork, and silhouette composition against the sunset.
Move In for Live Luau Action
Step in just a little from your wide POV, and the luau suddenly feels alive in the frame. From your base position, take two small steps inward and you’re in the live-action zone. That shift helps editors bridge your outside view with action shots without a jolt.
Keep your shoulder timing clean. Move your body first, then swing the rig, so the motion feels smooth and the dancers stay usable. If you stop halfway or whip back and forth, the footage turns shaky fast. Commit to the move.
You can also step in about one camera-length for brief close moments, then settle. Listen for ambient sound, from drums to cheers. Be mindful of luau etiquette when moving in, so you capture the show without distracting performers or guests. With good entrance anticipation, stay ready on your shoulder and make that small inward move when a performer appears. That’s where reactions sparkle on camera.
Take Two Extra Steps Closer
From your wide view, take two small steps closer and you’ll quickly turn a nice scene into a usable medium shot with faces, costumes, and flame-lit reactions. Those extra steps help you lock in the live action so the dancers stand out from the crowd noise, swaying palms, and busy background. Step into place with your body before you pan, and you’ll keep the move smooth, avoid a wild whip, and save your editor a small headache later. If you’re seated in the best seats, those extra steps can help you capture even clearer expressions and fire-knife action without overusing your zoom.
Close The Distance
In the glow of the torches, your first instinct is usually to stop a little too far back. Fight that urge. Take two small extra steps forward before you pan or swing. That simple move improves camera choreography, matches lens psychology, and boosts emotional proximity without feeling pushy.
Start with a wide POV view, then walk two paces in and settle into the closer spot. At a luau, especially during the Fire Knife Dance, that closer position helps you catch the flame detail and the rhythm in one frame. You’ll keep continuity clean and hand editors a dependable cut point between medium and close framings. Don’t creep halfway. Half-steps and hesitation look awkward, break scene rhythm, and usually waste the shot. Move your body first, then move the camera. Your arc stays smoother and the fire dancer’s grin lands with more texture, sweat, and applause. If you miss a beat, recommit fast and step in again.
Lock In Live Action
Once you’ve trained yourself to get closer, use that habit to lock in the live action that makes a luau feel real. Take two extra deliberate steps toward conversations and candid moments. That small move boosts camera intimacy, reveals facial expressions, and catches tiny lei adjustments you’d miss from shoulder distance.
You’ll also hear more ambient sounds, from soft laughs to whispered lines, while giving editors cleaner options between wider views and close reactions. The closer position creates better foreground and background separation, so cuts feel natural instead of jumpy. During the pre-show activities, this approach helps you capture included moments that set up the energy before the main performance begins. Move your body first, then settle and record steady action. Don’t drift halfway and hope it works. If framing changes, fully step back or forward and recommit. That baseline improves rehearsal timing and helps you catch eye shifts, hand gestures, and fleeting little stories.
Step Before You Pan
A simple rule helps here: take two small steps closer before you pan. At a luau, that little move pulls the dancers tighter into frame and saves you from leaning on digital zoom. One step helps. Two usually gives editors better close-to-medium coverage.
Think of it as footwork timing. You move first, plant your feet, then pan. That order keeps body camera alignment steady and preserves smooth motion. It also cuts the half-step stutter that turns fast hula or fire knife action into a whip-pan blur. For beach performances after dark, good night phone settings can also help keep motion cleaner and details brighter. Watch for anticipation cues like a grin, drum accent, or lifted torch. If you expect a reaction, commit to those two paces early. Then you’re close, calm, and ready when the moment lands, not scrambling like a tourist chasing sunset selfies.
Step Into Position Before You Pan
Plant your feet before you pan, and your luau footage instantly feels calmer and more usable. Before you swing, take one or two deliberate steps into the exact view you want. You stabilize footing, use peripheral awareness, and anticipate movement instead of chasing it. For a medium, step 2 to 4 feet. For a wide, go 5 to 8. Then commit to that stance before panning slowly. Keep your framing respectful of cultural shows so the performance stays the focus rather than becoming intrusive coverage.
| Shot | Step-in distance | Why it helps |
|---|---|---|
| Close to medium | 2 to 4 ft | Keeps action readable |
| Medium to wide | 5 to 8 ft | Preserves stage continuity |
| Dancer crossing | Small reset | Avoids jerky whip |
| Drum feature | Exact stance | Gives cleaner usable frames |
You’ll notice steadier firelight, sharper leis, and fewer awkward halfway stops when the drums kick louder.
Hold Your Framing Longer
When you find the shot, commit to it and hold it a few seconds longer than feels natural so the chant, smile, or swish of skirts can fully land. You’ll get cleaner coverage when you stay in a listening or speaking frame until the beat is done instead of changing your mind mid-move. If you need to go from wide to close, plant yourself first, then swing the camera and let the new frame breathe. Good camera settings help that longer framing look steadier and more intentional during luau performances.
Commit To The Shot
Resist the urge to pan away too soon. At a luau, you help the edit most when you commit to one clean frame and hold it two extra steps. That little pause gives dancers breathing space, preserves eye contact, and rewards a steady grip with usable live action. If the performance includes menu, music, and island vibes, a longer hold also helps capture the full atmosphere without cutting away too early.
- Choose listening or speaking coverage and stick with it for the whole take.
- When you reach a new spot, plant your feet and lock the frame for one full beat.
- If you go wide, stay wide through applause, entrances, or brief interruptions.
You don’t need fancy moves. You need conviction. Reactions land better when you don’t switch mid-take. If you hesitate, pick the framing again and hold steady. That simple reset restores rhythm and gives post more footage they can actually use later.
Let Moments Breathe
Often, the best luau footage comes from waiting a little longer than feels natural. Hold your framing for two extra steps, about two to four seconds past instinct. Those added beats catch smiles, glances, breathing pauses, and ambient silence that make a live show feel real.
When you settle on a wide view or a close shot, stay with it long enough for the moment to land. If you move in closer, stop and hold the new composition for a full beat, around three to five seconds. This works especially well during a hula performance, when small hand motions and facial expressions often unfold a moment after the main movement. Timing gaps often reveal the good stuff: a dancer’s grin, a drum echo, a guest leaning forward. If you sense an entrance or beat change coming, lock in and trust the frame. After any hesitation, reset, then hold two extra seconds. It keeps footage usable.
Avoid Mid-Move Changes
Those extra beats matter even more if you keep your framing clean once you choose it. At a luau, resist the urge to drift mid-shot. If you step in for a closer view, finish the move, take those two extra steps, and hold for several seconds. Editors need complete moments, not almost-there camera wandering.
- Pick anchor positions for listening and speaking, then switch only after you fully commit.
- Use small, clear moves between close-up and medium shots, with deliberate pauses after each one.
- Anticipate your next angle with your body first, then pan so you get smooth shifts.
If you are filming from mobility seating, hold your frame even more carefully so accessible sightlines stay clear and usable. If a producer interrupts or a dancer resets, return to your framing and hold again. That steady beat captures drums, leis, flickering torches, and reactions without awkward, unusable cuts for editors later.
Avoid Half Moves and Whip Pans
When you need to shift your angle during a luau show, finish the move cleanly instead of stopping halfway and hoping the edit will forgive it. Half moves leave mismatched frames, and editors usually toss them. Instead, commit, take one or two small steps, then make a smooth swing with steady pivots, controlled follow through, and silent stabilization. If your seat placement affects your shot options, understanding VIP vs Regular seating at Chief’s Luau can help you plan cleaner camera moves.
You’ll get better footage if you move your body first, then let the camera follow once. Don’t whip pan across tiki torches, dancers, and drums just to chase action. Fast back and forth swings smear detail and kill usable reaction shots. Stay in a POV wide position, keep shifts minor, and settle into the next framing with purpose. If you hesitate or reverse direction, the clip usually turns into beachside confetti for the timeline later.
Shoot Medium and Close Luau Angles
You’ll get stronger luau footage when you step in with purpose, moving from a waist-up two-shot into chest-up frames and then tight closeups that catch a singer’s face right as the drums lift the mood. Hold each framing long enough to feel intentional, because those steady 3 to 5 seconds give editors clean cuts instead of wobbly almost-moments. Stay ready for medium reaction shots too, so when a guest laughs or a producer slips into view, you can catch the spark without chasing it like a lost flip-flop. Since Chief’s Luau follows a step by step celebration flow, you can plan these angle changes around each part of the itinerary instead of guessing what happens next.
Step In For Closeups
A simple step inward can turn a scenic luau wide shot into something far more intimate. From your wide view, take two small steps closer to land a useful medium angle. Then, if the moment supports it, add one more step for a closeup. Your lens choice matters, but so do camera ergonomics. Move your body first, then swing the shoulder rig so the motion feels clean. Let ambient audio guide your timing too. If you are covering a Chief’s Luau for first timers, these closer shots can also help explain the experience in a simple, welcoming way.
- Step in before panning so you don’t create awkward half-moves.
- Stay slightly wider than super tight. You’ll keep expressions and a little leadroom.
- Use pauses, audience laughter, or crew resets to grab reaction shots and detail inserts.
These closer frames still feel alive. You catch flower leis, quick smiles, and drumming hands without losing the luau’s easy rhythm.
Hold Committed Framing
Now that you’ve stepped in for tighter coverage, hold that medium or close luau frame with real intent. Take one or two purposeful steps in from your wide POV, then stop. Let camera discipline and framing patience do the work. A torso-to-head view catches chant, smile, and hand detail while still keeping the firelight, leis, or drums in play.
If you’re filming arrival moments, note the Chief’s Luau check-in timing so you can be in position before guests begin lining up. Commit to that frame through a full phrase or song section. If you drift, hesitate, or reverse before the beat lands, you hand editors a jumpy cut they can’t use. For closer shots, bring the camera to shoulder readiness first, then move your body before swinging the lens. That smooths the shift and preserves continuity. Use intentional stillness. During applause or song breaks, quietly collect a few tight inserts.
Capture Medium Reactions
When the chant rises and a table of guests suddenly leans in with a smile, slide two small steps in from your wide POV and plant yourself in a medium frame from waist to head. You’ll catch dancers and guests together, which preserves continuity and reveals audience choreography and lighting chemistry. If you know the Chief’s Luau Timeline, you can anticipate stronger guest reactions from arrival through the finale and be ready before the moment peaks.
- Hold that medium or close frame one full beat after the reaction.
- For close-ups, move your body first, then swing camera, and take two extra steps.
- During entrances or set breaks, grab inserts of authentic laughter, clapping hands, and quiet surprise.
Those small, controlled moves keep the live feel intact. Halfway stops and whip-pans usually sabotage usable footage. If a face brightens, commit. Editors love clean reaction cutaways, and you’ll leave with more moments that feel observed, not chased and truly alive.
Capture Dancers Listening and Reacting
Listening shots can quietly become some of your best luau footage. Take two small steps inward from your wide POV and you’ll separate stage action from real reaction. Set a medium frame and hold for 3 to 5 seconds when a dancer is clearly listening. Ambient audio helps these moments breathe. Eye contact and tiny glances off-camera often give you the best Timing cues.
Stay shoulder-ready during downtime so you can catch authentic looks when a producer or crew member enters. Use small body moves to shift between close-up and medium before you swing the camera. Don’t stop halfway or whip-pan into mush. Steal these shots during timeouts and little distractions. You’ll often find the most natural expressions there, along with fluttering costumes, soft drum spill, and the kind of usable footage editors quietly love. If you’re moving around the venue on foot, account for how much walking is involved so your shots stay steady and intentional between positions.
Film Crowd Reactions During Breaks
When the performers pause, keep your camera rolling and catch 10 to 20 seconds of nearby faces laughing, clapping, or sneaking a phone video. Step a little wider before you frame so the crowd feels live and the cut back to the stage looks smooth. If staff suddenly step in, stay on your shoulder and grab a few quick reaction angles, because those small moments can save an edit like a well-timed coconut. Since families often ask whether kids enjoy Chief’s Luau, filming children smiling and reacting can add useful context to your footage.
Breaktime Audience Reactions
As the show slips into a break, shift your focus from the stage to the crowd and set a wide POV two extra steps back from the action. That extra distance helps editors preserve lighting continuity and gives you room to catch applause, chatter, and ambient audio cleanly. If older guests are moving through aisles, keep sightlines clear and be mindful of comfortable walking paths near seating areas.
- Stay shouldered and edge inward one or two steps as laughter rises.
- Use producer entrances or stage distractions to grab quick close inserts.
- Hold your frame through the full reaction instead of whip-panning away.
Move before the moment lands, so reactions feel immediate, not posed. Watch for smiles, clapping hands, and that brief sparkle when guests realize they’re having fun. Keep ethical consent in mind when isolating faces. If you stay calm and curious, you’ll gather natural breaktime footage with texture, rhythm, and real island energy.
Candid Crowd Cutaways
Often, the best cutaways happen in the small pauses between the big moments, so stay shouldered up and ready during performer breaks or producer entrances. Step two small paces closer, then catch 3 to 6 seconds of wide and medium reactions under ambient lighting.
Work slightly wide of POV first. Ease into closer framing before you swing back to the stage, so your edits feel natural. During downtime, grab 5 to 10 shots with candid angles: laughter, applause, phones rising, kids leaning forward. Keep your unobtrusive setups tidy and your movement committed. No halfway stops. No frantic whip pans. Roll continuous 8 to 12 second clips so editors can actually use them. Watch for staff entrances and little distractions too. Those listening faces often become the secret glue between the night’s big spectacle.
Use Off-Camera Interruptions for Reactions
Even if the interruption happens just outside your frame, don’t rush to chase it. Hold your framing and keep rolling for 3 to 6 extra seconds. You’ll catch authentic listening faces, tiny eyebrow lifts, and the sort of reaction timing editors love. At a luau, unexpected cues often arrive after punchlines, song endings, or a flashy costume reveal.
When action slips off-frame, stay put and roll a few beats longer, the best reactions usually land just after the moment.
- Stay camera-on-shoulder during downtime so you can grab immediate reactions.
- Take two small steps inward before you swing, which helps audio sync and steadier framing.
- If you move, commit to it and hold the new reaction for at least 3 seconds.
A wide POV helps you catch both the interruptor and the performer without breaking continuity. Skip whip-pans and halfway stops. Calm coverage beats frantic hunting, and yes, it looks cooler too.
Grab Luau Inserts and Cutaways
Start by scooping up inserts and cutaways before you think you need them, because a luau changes fast and the little details save your edit later. Take two small inward steps and grab wide POV views of the stage and audience. Those shots lock context while giving you safe cover for trims.
During pauses, catch 3 to 6 seconds of real reactions. Look for smiles after jokes, performer resets, and quick glances across the crowd. Then collect 5 to 8 second medium-close shots of leis, hands, instruments, food prep, and props placement. Keep frame fill around 30 to 50 percent. Watch lighting variations as torches flare and dancers turn. Anticipate movement, shift first, then pan. Record matching 10 to 20 second inserts so continuity holds, and audio sync stays painless later.
Stay Shoulder-Ready Between Performances
Once you’ve gathered your cutaways, keep the camera on your shoulder during the break, because a luau can snap back to life with almost no warning. Stay planted and alert. Take one or two small inward steps before the next cue so you can lock into position fast. Good shoulder ergonomics and calm breathing techniques help you hold steady without tiring out.
- Move your body first, then swing the camera, so your opening frame feels clean.
- Hold a wide POV while waiting, which lets you tighten smoothly without breaking visual flow.
- Use kit accessibility to spot quick reaction shots, like a producer walking in or guests glancing toward the stage.
Choose your stance and commit to it. If you fidget or half-move, you’ll lose rhythm, and the first drumbeat won’t wait for you.
Keep the Camera Rolling for Usable Moments
Often, the best luau footage shows up in the tiny pauses between the obvious action, so keep the camera rolling when the room seems to take a breath. Those extra beats matter. A producer stepping in, a dancer waiting, or two small steps toward your next spot can reveal real smiles and relaxed glances.
Stay shoulder-ready and make subtle pacing moves before you swing the camera. Favor wide POV framing and continuous recording so editors get cleaner continuity and more usable inserts. Hold your choice once you commit to listening or speaking. If you hesitate halfway, the cut usually dies on the timeline. During timeouts or distractions, capture off-camera reactions, producer exchanges, and ambient audio. Those quiet scraps often become the glue between bigger moments. Sometimes the magic arrives while everyone’s pretending nothing’s happening.
Frequently Asked Questions
What Camera Settings Work Best for Filming Luau Shows at Sunset?
Use 4K at 24–30fps, open to f/1.8–f/2.8, keep shutter 1/60–1/200s, set white balance 4000–5200K, use ISO 800–1600 to limit high ISO noise, dial exposure compensation to -0.3 to -1.0 EV, and lock focus.
Should I Use a Gimbal, Tripod, or Handheld for Luau Coverage?
Use handheld for most luau coverage, a gimbal for smooth moves, and a tripod for locked wides. You’ll balance stabilization tradeoffs, protect operator ergonomics, and plan movement blocking so editors get clean, continuous, usable shots.
How Do I Record Clear Audio With Music, Drums, and Crowd Noise?
Use close mics on drums, a shotgun near performers, and direct PA feeds; secure Lavalier placement on the MC, add Wind protection outdoors, monitor with headphones, leave headroom, and use Audio ducking later to tame crowd noise.
What Lenses Are Best for Filming Luau Performances and Audience Moments?
You’ll get the best coverage with a 24-70mm f/2.8, plus wide angle primes for immersive stage shots, telephoto zooms for distant reactions, and portrait lenses for low-light close-ups. If you travel light, use a 24-105mm.
Do I Need Permission to Film Guests or Performers at a Luau?
Yes, you usually do. You should get written model releases from performers and featured guests for commercial use, follow venue policies, respect privacy laws, post filming notices, and offer opt-outs for audience members whenever possible.
Conclusion
Like Odysseus following a bright line home, you’ll find your story by watching where the light and rhythm lead. Start wide. Step in with purpose. Hold for the drumbeat, the torch flare, the rustle of grass skirts, and the grin in the third row. Keep rolling between numbers, because that’s when the leis swing and kids clap offbeat. You’re not just filming a show. You’re catching the warm, salt-air proof that you were there.